The entire tone of the 2002 Hogwarts Celebration was set when my guests received their personalized parchment invitations by Owl Post. When they saw those, they knew they had to attend the party by all means, just to see what else I would be doing! heehee... Would you like to see why? Read on...

Being a complete child of the digital age, usually I only send email
invitations for my other parties like Halloween or Mardi Gras, but for a
Hogwarts party, I knew I MUST send out paper invitations, preferably
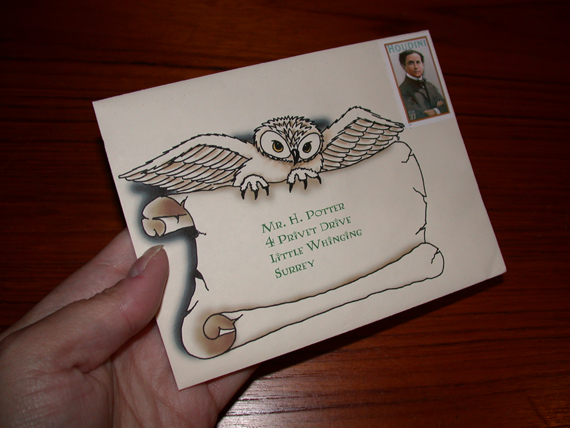
somehow by owl...so, why not have the owl on the outer envelope, with the
"real" parchment letter enclosed?
I had also lived in the same gigantic apartment complex (buildings A
through EE!) for four years, and the complaint I always had from guests
was that they couldn't figure out how to find my apartment...so, why not
include a Marauder's Map-inspired map of "Hogwarts" showing people how to
find the "Great Hall" which was my apartment? Hee hee...this was getting
fun!

What else? Oh, of course this should be one of the annual letters from
McGonagall, complete with green ink lettering and green Hogwarts wax seal,
then I also decided to have an official invitation with the Hogwarts
crest, since this was a "celebration in honor of the birthday of Mr. Harry
Potter" after all.
Here is the full text of McGonagall's letter:
Dear Mr. Potter [each was personally addressed],
Welcome back for another year at Hogwarts, albeit earlier in the
season than usual. We do hope you will be able to join us at this
earlier time for the celebration, since we expect great fun will be
had by all in attendance.
Since the surrounding area is well-protected by Memory Charms, it
will be safe to wear normal wizard attire, but if you miss the Hogwarts
Express or are unable to Apparate and must come incognito by way of
Muggle transportation, feel free to arrive dressed in the Muggle manner.
If you are unable to reply in the normal manner by owl, please reply
to britta@britta.com or via the Muggle telephony system at 408-xxx-xxxx.
We are looking forward to your arrival at Hogwarts.
Sincerely,
Minerva McGonagall
Deputy Headmistress
Hogwarts Academy

Now that I knew everything I was going to include, it was time for the
design and construction. I drew the owl holding the scroll in pencil,
then scanned it into my Mac and made the image transparent in Photoshop.
Since the plain black and white image looked too plain, I airbushed the
shading in by hand in Photoshop.
One extra detail was the postage stamps I used. I searched and searched
on the USPS website for any owl stamps, but no luck, so I ended up with
unique carnivorous plants, which at least seemed to fit in with a possible
Herbology class. At least they were more interesting than they could have
been with American flags or brightly colored Happy Birthday! :)

I used the same technique for the map, but by starting with a
digital photo of one of the green apartment complex gate placard maps,
which I changed to black and white, then inverted to get black on white.
I traced the authentic highlights of that map onto a new sheet, then added
the detail like the Whomping Willow and Hagrid's Hut. After scanning my
hand-drawn map and making it transparent in Photoshop, I added solid
color, the gold grain texture for the roads, all the text, and the
Hogwarts seal and saved as a TIF for layout use in Pagemaker.
The green "embossed" Hogwarts crest used on both the letter and the
invitation began as the same full-color crest as on the map but changed to
grayscale in Photoshop, then filtered over with green and the Photoshop
"embossing" filter.
All the layout & printing was done in Pagemaker using the Lumos font
I found online, created by fellow Potterphile Sarah McFalls:
http://www.geocities.com/carpesaponem/lumosmain.htm

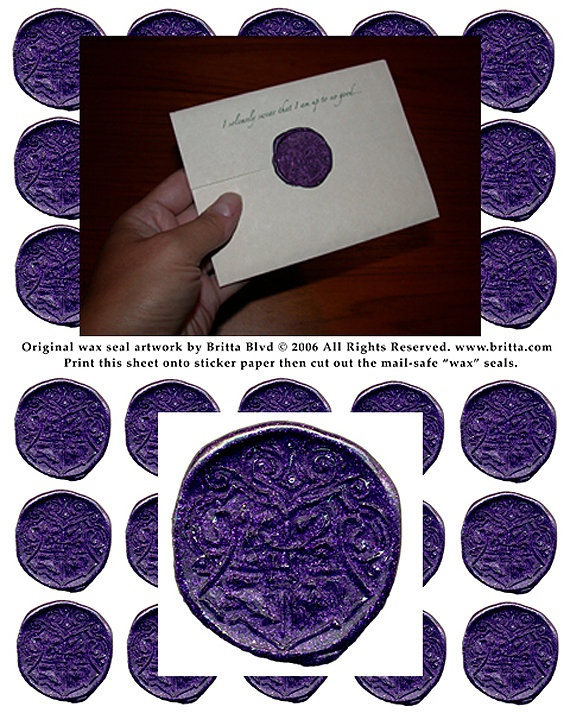
I made the Hogwarts seal myself out of Sculpey craft polymer clay you
bake in the oven to harden, molding the basic shape the correct size for a
seal, leaving a large enough amount for the handle, then I used a
toothpick and a straight sewing pin to carve in the detail, every so often
gently mashing it back down onto the smooth flat table so I knew the
design would still be the same. After I got it looking like I wanted
(remember, everything you carve into the seal stamp will end up as a bump
in the wax seal), I baked it according to the Sculpey instructions, with
the seal side face down on the smooth foil so I knew it would stay flat
while baking.

After it was fully cooled and I practiced quite a bit to be sure I
wouldn't accidentally ruin any of my painstakingly individualized
invitations, I used it oiled and chilled with the green sealing wax on
each individual invitation. (I actually used FauxWax from www.FauxWax.com
since it is more flexible and therefore easier to mail than resin sealing
wax). I would not recommend Sculpey for a seal that would get a lot of
long-term use over years and years, but I used what I had available at
the time. I've made at least 100 seals by now, but I am still
careful each time to make sure it is well oiled and chilled, otherwise
bits of the white Sculpey end up in the dark green wax seal.

Since I could not find parchment envelopes in quarter-page notecard size,
I used ivory envelopes for the "owls" and parchment paper for everything
else. Each letter was addressed personally to the recipient, along
with each owl envelope, but the invitations and maps were all the same.
All the parchment paper edges were trimmed by using my rotary paper cutter
with the "deckle" blade. I assembled all the pieces, sealed them with the
green wax, and voila!
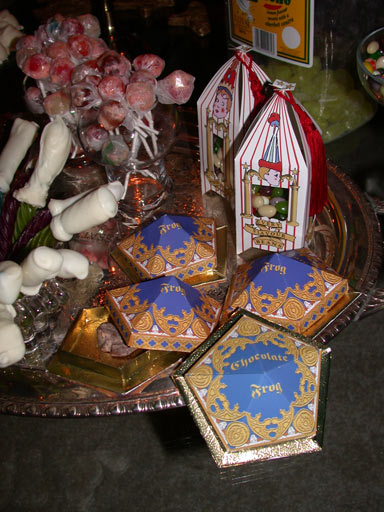
My Chocolate Frog Box & Card set,
Bertie Botts Boxes, Owl Holding Scroll image,
Hogwarts wax seal stickers, and other items are now
for sale at my Etsy store.