Gingerbread English Thatched Cottage
Due to my last-minute work on my Star Trek Insurrection promotion in December, 1998, I developed pneumonia over Christmas, and I wasn't able to sing very well. This put a big damper on our Christmas caroling plans (see the music page for some caroling clips), so I decided to have a Christmas in July party so we could sing when everyone was well and not so stressed out from the busy holiday season.
Why am I telling you all this, you ask? Well, I've always loved gingerbread houses, but since I'm always doing so much already during Christmastime, I haven't had the chance to make one since I was little, so I decided a gingerbread house would be one of my Christmas in July decorations...and here it is...
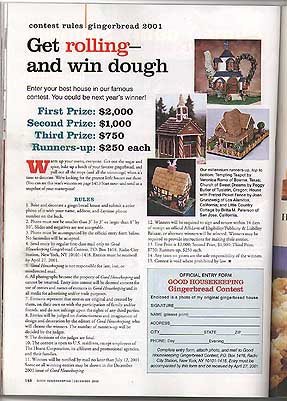
WAIT! News Flash! I did enter in the Good Housekeeping Gingerbread House Contest for 2000 (entries are due in April, so I had missed 1999), and I was one of the top seven houses out of about 400 entries! I was one of four runners-up, which means not only did they print my house in the magazine, but I also got $250! Not too shabby for my first contest attempt!
Click on the image to zoom in to see my house with my name printed next to it...
Okay, now back to the beginning of our story...
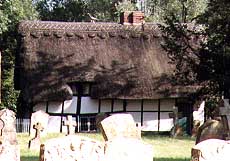
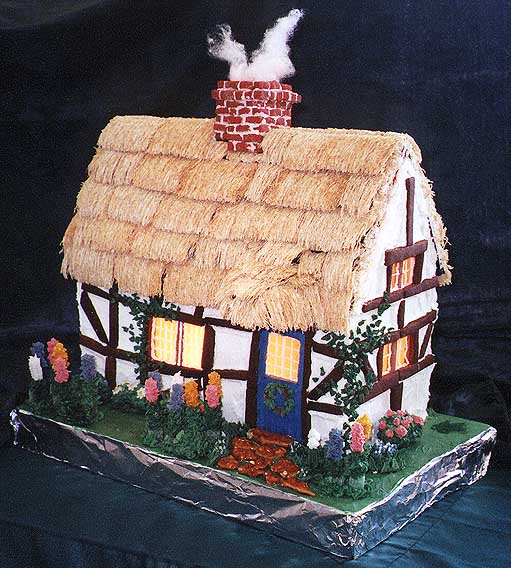
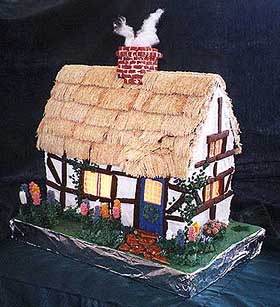
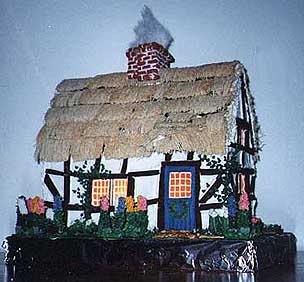
Since I had seen so many cute little thatched cottages during my stay in England in 1997, I thought maybe I could make one in gingerbread, using shredded wheat as the thatch. But I forgot that even though I had seen all sorts of cottages, I didn't take many photos of them, so I had to be resourceful searching for details...This photo of "The Thatched Cottage" at Dorchester Abbey in Oxfordshire was my main inspiration for the gingerbread house I made, including the crooked beams that look like they're sagging that just give it more charm...
If you've ever made a gingerbread house, you'll know that you really need more than two hands when assembling the actual house, since you have to wait for the royal icing to set enough to hold the walls together. I was paranoid enough that I did take photos at each stage (first when I had the walls decorated, then when I put two walls up, then three, etc), but since it survived intact, I'll spare you those photos that span the 24 hours of work that went into this (12 hours each day)... ;-) If you would like to see the large image, click on this one...
The windows are made of a hard candy recipe that I poured into the window openings when the gingerbread walls were resting on as flat a surface as possible on aluminum foil. Once the candy had completely cooled, I was able to decorate the walls and add the pane detail in frosting. Since I had done Lifesaver candy stained-glass windows when I was little, but my mom remembered that lighting the candle inside the house had melted the house pretty quickly, I cut a functional chimney hole in my roof for venting. My short tea light was fine, and nothing ever melted on this house. Actually, the candle burned itself out while we were singing at the party, and Steph said, "Look, they've gone to bed. The lights are out..." ha, ha...
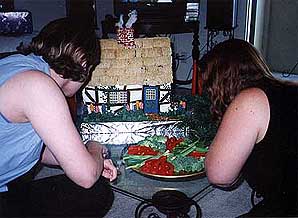
The only parts of this house that are not edible are the base of the roof underneath the shredded wheat, which is foamcore board, since gingerbread gets too heavy and makes the walls collapse, and the cotton batting "smoke". I thought of trying to use cotton candy for the smoke, but I couldn't find any in my cursory search for possible ingredients. I was planning on having my guests help me eat the house at the party, but they all declined since they said it was "too nice to eat!"...so I kept it at my apartment until the spring of 2000 when I finally just tossed it in the dumpster...The amazing thing is that my notorious cat Kylie actually left it alone!

The roof is removable so the candle can be easily lighted, so the gingerbread brick chimney just rests on the opening on top. All the bricks were made individually with a small amount of red food coloring in the gingerbread to give it the brick color. I also randomly dusted the bricks with some flour before baking to give them the aged brick look. They are assembled with normal frosting for the mortar...(note the decorative edging around the top edge...not bad for my first masonry project, huh? ha, ha...)
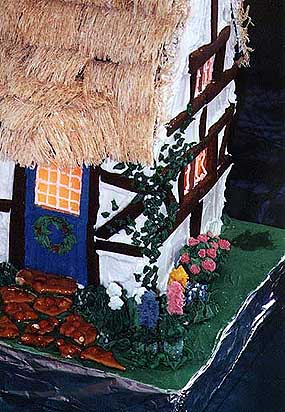
The "timbers" for the timber-frame construction are very well-done (almost burnt) gingerbread slabs set into more plain white frosting "plaster", and the pathway is peanut brittle (I couldn't find the hard candy that looks like actual stones...does anyone know where I can get some?)...I carefully frosted the blue door with a knife so it looks like planks (hey, my mom actually noticed that without me telling her!), and there is even a thatched porch over the door...The wreath is made by just using the leaf decorator tip with green frosting, but the "berries" on the wreath are chopped up red string licorice...

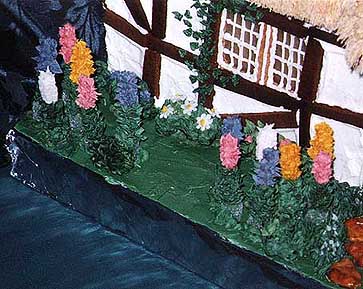
(click on this image for a slightly closer view)
All the rest of the decoration is done with various colors of the same frosting, with some structural help. The tall flowers are frosting (using the leaf tip for the leaves & the star tip for the flowers) over a stick preztel stuck into a green gumdrop for stability. The low bushes are vanilla wafers decorated with more frosting. The bushes next to the house are green rock candy covered with green frosting using the leaf tip, then the flowers (pink roses & white daisies) were made separately on waxed paper, left to set, then carefully placed on the bushes. The ivy climbing the walls is just the leaf tip again, but I think that's my favorite effect...I've always liked ivy-covered walls, so I just had to include them in this project... :-)